Most
of the blogs I have read recently have had written summaries of their
past year’s activities. Unfortunately I have had a little bit of
difficulty in preparing a summary of my activities because my hard
drive decided to give up the ghost the day before New Years Eve and
took all my photos and patterns with it to hard drive heaven.
Crying,
moaning and gnashing of teeth did not help at all, and unfortunately
it is my own fault for not backing anything up. Luckily all my
handicraft projects are stored in my blog and Ravelry.
My
first job of the New Year is to welcome my readers to the pleasures
of getting aquainted with Microsoft Windows 8.
Initially
it has been a real headache as it is so different from Windows 7 and
after three weeks it is still a bit of a problem. Even to log off
from my computer I had to do a Google search for help! I still
haven’t worked out how to upload photographs from my digital camera
and I consider myself to be an average computer user and quite IT
literate. I will just have to carry on learning Windows 8, I don’t
have a choice really, but I wish there were courses for it.
In my knitting life I
have picked up some new challenges since the New Year. Although I
have been knitting for years but have only just decided for the first
time to take part in a test knitting and in a mystery knit-along.
These are both new and interesting experiences for me and I will
write about these next time.
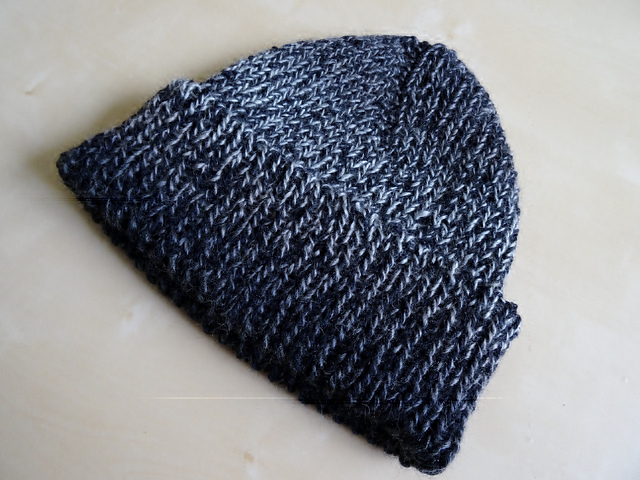
My
last project of 2013 was a pretty simple 1x1 ribbed beanie hat. I had
some yarn left over from the Cerus scarf project and I decided to
create a matching beanie from the remaining yarn. I had no idea how
big the hat would be from the remaining yarn or how many stitches I
should cast on. I decided to start from the top of the head and
increase until I got the right width and then knit until the yarn
finished. I started off on four double point needles and as the hat
grew I switched to circular needles. Doing this, it is very easy to
try the hat for fit during knitting and to see if it still needs to
be increased or not.
My guide for this is as
follows:
Choose your matching
yarn an needles.
Cast on 8 stitches,
divide the stitches on to four
needles and start
to knit in rounds, following the
pattern 4 times per
round.
Continue increasing
in the same manner. Try the hat on
as you knit, or lay the hat on a
table and measure the circumference.
When
you reached to desired circumferece continue knitting
1x1 rib without increasing until the
desired height.
Cast
off with a sewing needle to obtain
beautiful edge.
If anyone should want to use this pattern then all I ask is that you credit me with the pattern by linking it to my blog - many thanks.
Ravelry
download now
Happy knitting!
Tore on olnud lugeda blogidest kokkuvõtteid möödunud aasta tegemistest. Kahjuks on mul teatavaid raskusi ülevaate koostamisel, sest vana-aasta eelviimasel päeval otsustas kõvaketas töölepingu üles öelda ja kõik mu pildid ja kirjapandud mustrid ühes võtta. Käsitöised tegemised on õnneks blogis ja Ravelrys olemas. Siinkohal tahaks tervitada kõiki kaaskannatajaid, kel on olnud õnn ja rõõm tutvuda uue Windows 8-ga. Esialgu on ainult üks paras peavalu! Isegi selleks, et välja logida arvutist pidin Google otsingust abi leidma! Pilte fotokast üles laadida ka ei oska. Ometi ma ei pea end halvaks arvutikasutajaks. Nutt ja hala ei aita enam midagi, oma viga, et ei ole back-up'i teinud kõigest. Eks ma püüan nüüd areneda :)
Käsitöises vallas alustasin uut aastat uute väljakutsetega. Aastaid olen kudunud, kuid alles nüüd otsustasin esimest korda osa võtta testkudumisest ja salakudumisest. Mõlemad uued ja huvitavad kogemused minu jaoks. Sellest kirjutan järgmine kord.
Eelmise aasta viimane kudum oli päris lihtne 1x1 soonikus müts. Cerus sallist ülejäänud lõnga tahtsin kududa mütsiks, kuid polnud aimugi, kui palju lõnga jagub. Ja ka silmuste arvu ei hakanud välja nuputama. Otsustasin alustada pealaelt ja kasvatada, kuni on paras laius käes, seejärel kududa, kuniks lõnga jätkub. Alustasin neljal vardal, mütsi kasvades võtsin kasutusele ringvardad. Sel viisil kududes on hea mütsi töö käigus proovida, kas veel kasvatada, või hakata sirgelt kuduma.
Juhend on lühidalt järgmine:
Vali oma lõngale sobivad vardad.
Loo 8 silmust, jaga silmused neljale vardale ja hakka kuduma ringselt, järgides skeemi 4x ringil.
Jätka kasvatamist samal viisil, kuni laius on paras. Proovi mütsi pähe või laota ringvarrastel olev mütsipõhi lauale ja mõõda ümbermõõt. Kui soovitud ümbermõõt on saavutatud koo edasi sirgelt 1x1 soonikus, kuni soovitud kõrguseni.
Mina lõpetasin nõelaga ilusa ääre saamiseks.
Kui keegi peaks soovima kasutada seda juhendit, siis kõik, mis ma palun, et te viitaksite mu blogipostitusele oma blogis vm. Palju tänu.
Head kudumist!

.JPG)